


Step Two : Taking the Picture
A. Take the bulbs and screw them into the slots (4 if you're using a B5; 2 if your using the B6).
B. You will need to insert the bulbs into the opening on the top of your Gocco and make sure that the arrow is pointing in the right direction (honestly it won't work if you don't do it any other way)
C. Once the bulb holder is in place Grab the handles of the gocco and with some a little force press down on the gocco. What will happen is a flash will occur (taking the picture of the image)
D. Once you have done this DO NOT OPEN YOUR GOCCO--- I REPEAT! DO NOT OPEN YOUR GOCCO. Pull out the light bulb holder and set it aside. Allow for the bulbs to cool before discarding (I usually move it out of the room I gocco in cause I don't enjoy that smoky smell.)
E. After removing the bulb holder, now open the gocco and your image should be attached to the screen.
F. Remove the Original Overlay paper from the sticky pad and set aside.
G. Pull out the screen set the filter aside and lay the screen flat so the clear side and screen covering are facing you.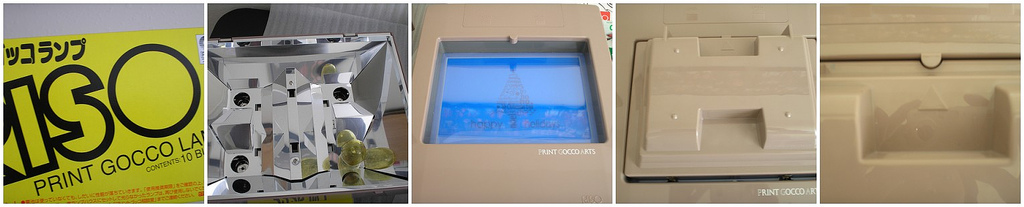

Step Three: Lets Color
A.Open up the clear screen covering to show your image. Many images require more than one color so to make sure those colors don't mix you need the ink blocking tape. Place the ink blocking tape around the image areas that require specific colors, note my picture.
If youre image only requires one color I still suggest using the ink blocking tape around your image to control the amount of ink used and where it goes.
B. Once you've put ink blocking tape around your image, lets color. Using the inks, color your images the desired colors.
C. Once all the images have been colored close the screen covering and get ready to print.

Friday, November 30, 2007
Let's Gocco Pt. 3
Subscribe to:
Post Comments (Atom)
No comments:
Post a Comment